Wednesday, January 20, 2010

#64 Elasticized waistbands

I actually have 2 different types of elasticized waistbands on my Singer 2010 list so I think #64 is a typo.  I'll use this post to summarize some general information from the Singer book.
------------------------------------------------------------------------------
ELASTICIZED WAISTBANDS

1.  Can be cut-on or separate
  • Cut-on waistbands are basically an extension of the garment.  From the point where the garment should hit your waist, you add more length to the fabric.  This extra length gets folded over to make a waistband.
2.  Cut-on waistband types
  • With a casing:  more casual look; firm braided or woven elastics work best; elastic can be adjusted for a better fit later because the elastic is not caught in a seam
  • Topstitched:  number of topstitched seams and spacing can vary according to your preference; can use drawstring elastic for this
3.  Types of separate waistbands
  • Smooth:  best for a slim-fitting garment because the waistband will look like a traditional waistband when stretched around the waist; firm elastic is best (1-1.25 inches wide)
  • Shirred:  best for fuller styles like a full skirt; works well with wide elastic; firm elastic is best; waistband can be topstitched
4.  Elastics
  • Firm:  nonroll elastic is an example; the length of elastic should be cut to your waist measurement or 1-inch smaller
  • Soft:  knit elastic is an example; the length of elastic should be cut 3 to 5 inches smaller than your waist measurement
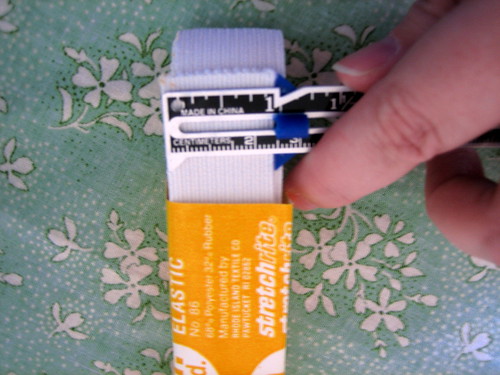
This is a knit elastic pictured below.
    Elastic Waistband with Casing--measuring elastic
  • Topstitching:  can cause the elastic to lose some stretch; shorten the elastic up to 1-inch to get a better fit
5.  Joining Elastic Ends
  • Overlapped method:  best for soft elastics; overlap the elastic ends and use a wide zigzag stitch to secure; a 3-step zigzag stitch can also be used
Elastic Waistband with Casing--overlapping elastic ends

  • Butted method:  best for firm elastics; bring elastic ends together ("butt ends") and secure with a wide or 3-step zigzag stitch
Before reading this book, I always used nonroll elastic and I always overlapped the ends.  The problems with overlapping on firm elastics are needle breakage and thread jams.  Use a midweight/heavyweight needle and hold onto your thread ends when zigzaging the overlapped ends.

    No comments:

    Post a Comment

    Just my opinion....

    This policy is valid from 11 December 2009
    This blog is a personal blog written and edited by me. This blog does not accept any form of advertising, sponsorship, or paid insertions. We write for our own purposes. However, we may be influenced by our background, occupation, religion, political affiliation or experience.
    The owner(s) of this blog will never receive compensation in any way from this blog.
    The owner(s) of this blog is not compensated to provide opinion on products, services, websites and various other topics. The views and opinions expressed on this blog are purely the blog owners. If we claim or appear to be experts on a certain topic or product or service area, we will only endorse products or services that we believe, based on our expertise, are worthy of such endorsement. Any product claim, statistic, quote or other representation about a product or service should be verified with the manufacturer or provider.
    This blog does not contain any content which might present a conflict of interest.
    To get your own policy, go to http://www.disclosurepolicy.org