Friday, January 29, 2010

Are you a snobby sewer?

I find people's sewing preferences interesting.  You tend to shop the same store, use the same brand patterns, frequently buy fabrics in the same colors, and various other preferences.  That's fine with me.  When someone develops a preference for one item over another, it tells me that this item is better (in that person's opinion) than another and I want to know why.  What's not cool is snobbery.  Generally the snobbery isn't coming from the blogger themselves but more so from the people following the blog.  Some comments are just mean at times.  I think the straw that broke my back was reading some of the comments to a post about online fabric shopping.  (I'm not giving you anymore details than that because I hate blog piggybacking.)

From reading various online sewing forum posts and sewing blogs, I'm come to the conclusion that all of the following are considered the generic store brand of the sewing world:
  1. Singer sewing machines
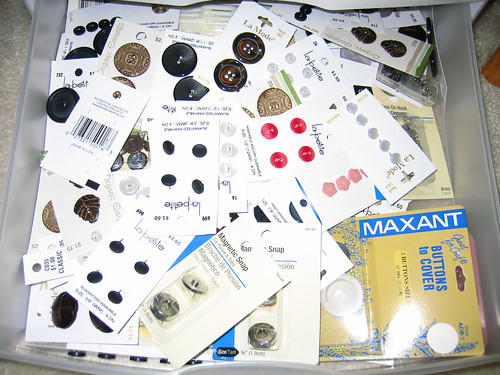
  2. Dritz sewing notions
  3. Pellon interfacing
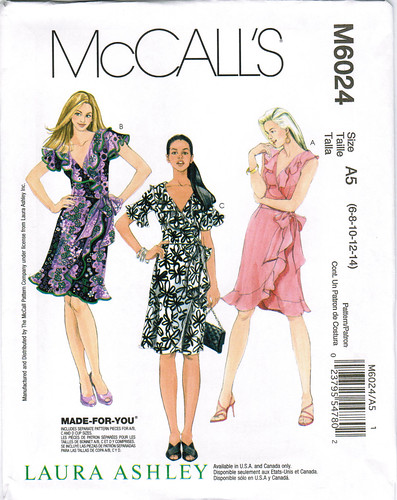
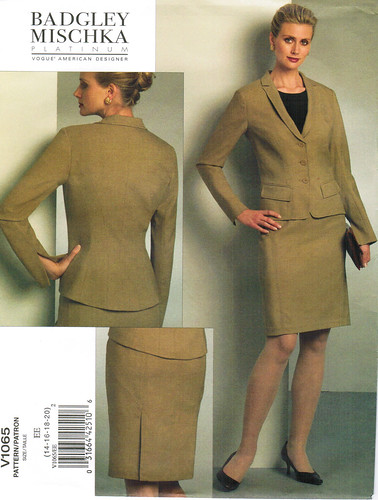
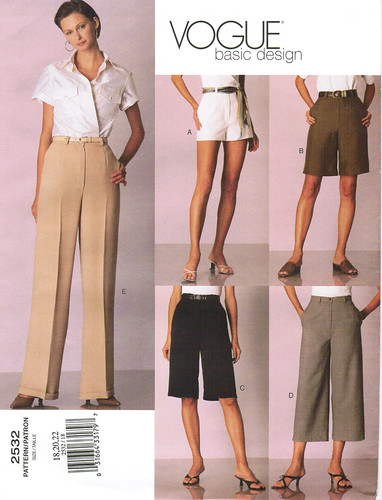
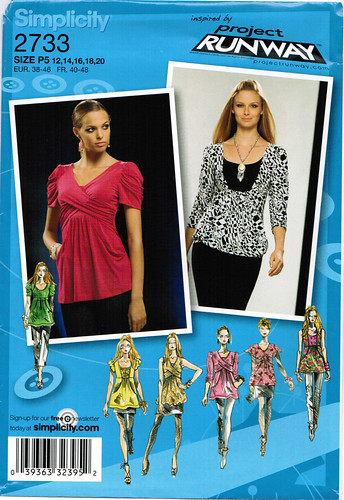
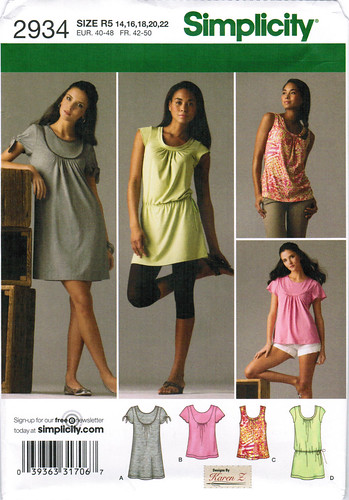
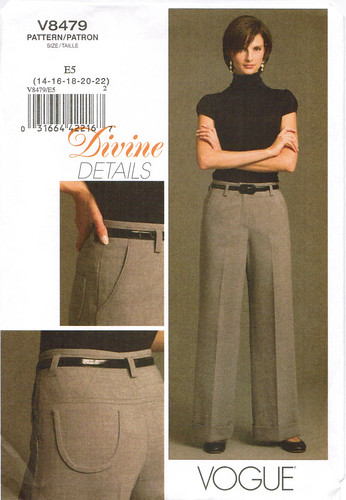
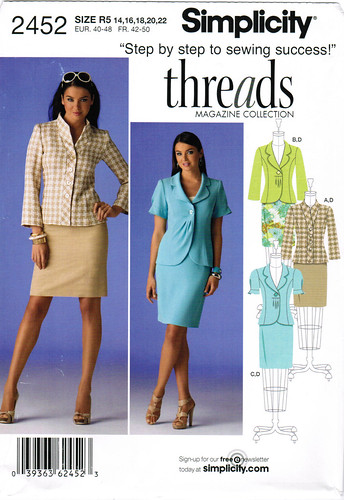
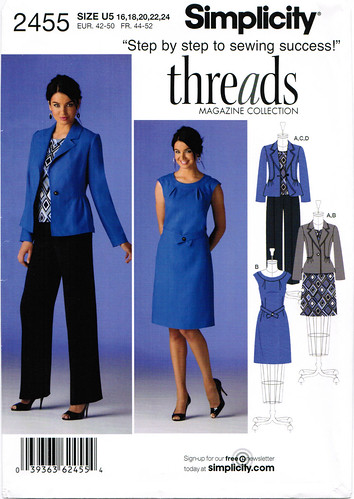
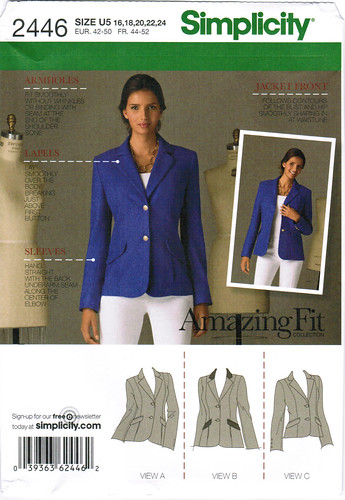
  4. Big 4 patterns (Vogue, McCall's, Butterick, Simplicity)
  5. JoAnn's
  6. Hancock's
  7. Fabric.com
  8. Denver Fabrics/Fashion Fabric Club
  9. Polyester anything
  10. Coats & Clark thread
  11. Any zipper not YKK
I'm sure I'm forgetting a few but you get the idea.  If it's not expensive (or everyone's favorite), it's crap.

Now this is just a theory but I think some people (notice I said "some", not all) are unsure of how to spot a good bargain on a quality product.  To verify that they are buying a quality product, they look for something expensive instead.  If it costs more, it must be better, right?  Depends.

The first time I got my hands on some silk double georgette fabric, I swore off JoAnn's and Hancock's challis solids and prints FOREVER.  (I bought the silk at Denver Fabrics, by the way.)  Many times you can feel quality.  You know it the second you pick it up.  Ah, yes!  This is good stuff.  If it's good fabric, you want to wrap it around yourself and wear it like a toga everywhere you go...or until your DH threatens to drop you off at the looney bin.  The yummy silk double georgette I bought was $6.00/yard (sale price).  Sure, I could have shopped NY Fashion Fabric Center for $17.99/yard but I like a bargain.  I don't buy something just because it's on sale.  I buy it if the quality is good, the price is cheaper than the usual cost, and I need it.  (My definition of "need" changes based on my checking account balance.)  The point is there are many who would have turned their nose up at the idea of buying silk at Denver Fabrics.  They'd prefer to pay more at another store because it is considered by others to be THE place to buy quality fabric.  That's fine by me.  If they aren't shopping where I shop, then there is more for me!!

I love many of the Jalie, Hot Patterns, and BWOF designs but I don't buy them.  I can always find something similar in the Big 4, buy it on sale, and never come close to paying what you did for the Jalie pattern.  I'm not calling anyone silly for buying the more expensive fabric, or the more expensive pattern.  I am asking you to stop judging me and others like me.  If we both end up in the same place but got there by different routes, what right do you have to say your way is better?  Our creative processes work differently.  That is one of the reasons I enjoy reading blogs.  It's a great opportunity to learn about different ways of doing things.

Think about that next time you want to post a nasty or underhanded comment about someone else's choice in materials, fashion sense or sewing ability.  Creativity does not have a minimum standard and knows no brand names.  You may catch me shopping at the hip fabric stores but I'll be holding a coupon in my hot, little hand.

Happy sewing to ALL!

Thursday, January 21, 2010

#65 Cut-on elasticized waistband with casing

Step #1:  Add length to your pattern pieces for a waistband casing.
If your pattern already called for a waistband with casing, you will see a waistline marked a couple inches below the top of the pattern piece.  If your pattern does not have this already marked, extend the pattern piece two times the width of the elastic plus 5/8-inch.  Example: 1-inch elastic, add 2-5/8 inches to the pattern piece (add to the waist height, not width)

Elastic Waistband with Casing--measuring elastic

Step #2:  Finish the raw edge at the waist.
Overlock with a serger, overcast with a sewing machine and overcasting presser foot, or zigzag the edges.  Zigzagging the edges isn't ideal as the fabric may curl within the zigzag stitch (see below).

Elastic Waistband with Casing--zigzagged raw edge

Step #3:  Fold over fabric to wrong side (fold over amount = width of elastic plus 1/2-inch).

Elastic Waistband with Casing--measuring waistband casing

I actually folded over 1-5/8 inches because I intended to turn under 1/4-inch to close the casing (more info in later steps).  I folded over and measured all the way around the waistband, pinning as I went.  If you place the pins closer to the raw edge, you can press the folded edge without moving the pins.

Elastic Waistband with Casing--ironing waistband casing

Step #4:  Edgestitch close to the folded edge.
Again, having the pins closer to the raw edge means you can leave them in while you stitch.  I don't have a presser foot with a guide for accurate edgestitching so I improvised with a zipper presser foot. 

Elastic Waistband with Casing--edgestitching top of casing


This is where my technique differs from the Singer book.  The Singer guide then recommends joining the ends of the elastic that you have already pre-measured for your waist.  Singer then has you place the elastic underneath the waistband casing, which is edgestitched along one length/edge and open on the other.  Then you would use a zipper foot and stitch close to the elastic all the way around the waistband, shifting the fabric around the elastic as you go.  This method has one advantage in my opinion, you won't have to insert the elastic into a sewn waistband and try to keep the elastic flat as you are doing this.  The disadvantages of this method are: (1) an ugly overcast/zigzagged edge is now visible and makes the garment look home sewn, (2) you must stitch accurately or risk catching the elastic in the seam, and (3) the cumbersome technique of sewing and shifting fabric around the elastic, which has already been stitched in a circle.  The following steps are my preferred method for finishing the waistband casing.

Step #5:  Turn under and edgestitch the overcast/zigzagged edge.  Insert the elastic.

Turn under the overcast/zigzagged edge of the waistband casing and press.  Edgestitch the turned under edge all the way around the waistband but leave a 2-inch opening for inserting the elastic.  Insert a large safety pin in one end of the elastic (not too close to the end of the elastic, especially if the elastic ravels easily).  Thread the elastic through the sewn waistband casing, shifting the fabric along the elastic as you go.  You can pin the other end of the elastic to the opening in the waistband casing to prevent losing it in the casing.

Elastic Waistband with Casing--inserting elastic into casing

Step #6:  Join the ends of the elastic.
When you reach the other end of the casing opening, pull several inches of each end of the elastic out so you can join the ends.  You may overlap the ends or butt the ends.  In either case, use a wide zigzag or 3-step zigzag stitch.

Elastic Waistband with Casing--overlapping elastic ends

Elastic Waistband with Casing--remaining opening in casing

Step #7:  Close the waistband casing opening.
Edgestich closed.

Elastic Waistband with Casing--finished

Step #8:  Distribute the fabric evenly along the elastic.  Stitch in the ditch to anchor the elastic.
After distributing the fabric, you should anchor the elastic at the center front, center back, and 2 side seams of the waistband to keep the fabric evenly distributed.  You can use a stitch-in-the-ditch presser foot or a zipper foot.

Wednesday, January 20, 2010

#64 Elasticized waistbands

I actually have 2 different types of elasticized waistbands on my Singer 2010 list so I think #64 is a typo.  I'll use this post to summarize some general information from the Singer book.
------------------------------------------------------------------------------
ELASTICIZED WAISTBANDS

1.  Can be cut-on or separate
  • Cut-on waistbands are basically an extension of the garment.  From the point where the garment should hit your waist, you add more length to the fabric.  This extra length gets folded over to make a waistband.
2.  Cut-on waistband types
  • With a casing:  more casual look; firm braided or woven elastics work best; elastic can be adjusted for a better fit later because the elastic is not caught in a seam
  • Topstitched:  number of topstitched seams and spacing can vary according to your preference; can use drawstring elastic for this
3.  Types of separate waistbands
  • Smooth:  best for a slim-fitting garment because the waistband will look like a traditional waistband when stretched around the waist; firm elastic is best (1-1.25 inches wide)
  • Shirred:  best for fuller styles like a full skirt; works well with wide elastic; firm elastic is best; waistband can be topstitched
4.  Elastics
  • Firm:  nonroll elastic is an example; the length of elastic should be cut to your waist measurement or 1-inch smaller
  • Soft:  knit elastic is an example; the length of elastic should be cut 3 to 5 inches smaller than your waist measurement
This is a knit elastic pictured below.
    Elastic Waistband with Casing--measuring elastic
  • Topstitching:  can cause the elastic to lose some stretch; shorten the elastic up to 1-inch to get a better fit
5.  Joining Elastic Ends
  • Overlapped method:  best for soft elastics; overlap the elastic ends and use a wide zigzag stitch to secure; a 3-step zigzag stitch can also be used
Elastic Waistband with Casing--overlapping elastic ends

  • Butted method:  best for firm elastics; bring elastic ends together ("butt ends") and secure with a wide or 3-step zigzag stitch
Before reading this book, I always used nonroll elastic and I always overlapped the ends.  The problems with overlapping on firm elastics are needle breakage and thread jams.  Use a midweight/heavyweight needle and hold onto your thread ends when zigzaging the overlapped ends.

    Sunday, January 17, 2010

    Book Review: Mother Pletsch's Painless Sewing by Pati Palmer & Susan Pletsch

    Mother Pletschs Painless Sewing

    Paperback, 128 pages
    Published in 2002
    ISBN: 978-0935278545
    Retails for $9.95 USD
    Details on Amazon here

    Book/Chapter Headings:


    1. "But I Don't Have the Patience to Sew"--basic intro chapter


    2. How to Sew Fast--10 tips for sewing fast (grouping tasks in blocks, faster pinning and cutting, preventing machine jams); organizing your sewing space (generic tips here); sewing wardrobes and coordinating pieces.  The only gem here is the 10 tips for sewing and only a few of them are gems.

    3. From Fiber to Fabric--This is my favorite chapter.  Synthetic, natural, and blended fibers/fabrics are covered here.  Great explanations about how the fabric will wear over time, absorbency, and choosing fabrics in the store.

    4. Textile Love and Care--contains a nice chart about caring for washable fabrics (why you use detergent when preshrinking, best temperatures for reducing wrinkling, etc.).

    5. Tools of the Trade--A nice shopping list for the beginner with no supplies yet.  Basic comparison of threads and how to choose a thread for your project; features to look for in a sewing machine or serger.  No information here regarding essential presser feet to own, however.

    6. Quick Shaping--This chapter is another gem for the beginning sewer.  The differences between lining, interfacing, and underlining are explained.  Interfacing choices are clearly explained, as well as how to use them (fusible vs. sew-in) and preshrink them, which ones to always have on hand, and of course, a plug for the Palmer/Pletsch Perfect Fuse interfacings.  There is a nice chart showing you where to interface garments (facings, collars, cuffs, yokes, etc.).  One great tip I picked up here is the "glue and fold" technique for underlinings.  When I underlined my wedding dress skirt, the finished dress has some slight rippling on the outer skirt.  I could have prevented this by making the underlining slightly smaller in width.  The "glue and fold' technique is a quick method for figuring out how small to make the underlining and keeping it matched up correctly. 

    7. Pretty Pati's Perfect Pattern Primer--This is where you will see significant overlap from the "Fit for Real People" book by Palmer/Pletsch.  The "Fit for Real People" book does a better job here.  This chapter contains information on measuring yourself to determine pattern size, design ease vs. wear ease, how to tissue-fit your pattern, making a body graph (a Palmer/Pletsch technique for determining your individual body shape; MUCH better explanation in the "Fit For Real People" book), a fit glossary of common problems (again, MUCH better in the "Fit For Real People" book), and how to fit as you sew.  This chapter is basically the Cliffs Notes version of their other books.  I recommend buying the other books instead.

    8. Mother Pletsch's Truths--How to straighten the grain, importance of staystitching, more fast sewing tips, reducing bulk, and understitching.

    9. Pretty Pati's Pointers--a couple of other time-saving tips

    10. Press As You Sew--Necessary tools for pressing and how to use them.  How to press; don't laugh, I never learned properly so this was helpful. 

    11. Necessary Details--Tips and how-to for plackets, setting in sleeves, shoulder pad placement, hem finishes, centered zipper, lapped zipper, invisible zipper, faced necklines, buttons and buttonholes (including corded buttonholes), and pockets.  A basic sewing book covers these with more pictures and instructions.  I also imagine that the other Palmer/Pletsch publications will give your more detail than the snippets here.

    12. Designing to Individualize--Ways to change the pattern to suit your style (adding/eliminating seams, converting darts, changing grainlines, etc.).  The "Fit for Real People" book gives you MUCH more detail.  I also own "How to Make Sewing Patterns" by McCunn and it has great ideas for changing collars, necklines, etc.

    Does this book have clear illustrations or photographs?
    For as small as this book is, there are tons of illustrations.  No photographs, just black & white illustrations.  The illustrations of pattern alterations and sewing techniques are clear.  The illustrations of people (aka cartoons) are corny.  They give you the impression that this book isn't to be taken seriously.

    Would you recommend this book as a MUST HAVE?
    No.  All the Palmer/Pletsch publications repeat information over and over again, which is nice for learning, but they also share information.  This means my "Fit for Real People" book contains some of the same information found in this book.  All the Palmer/Petsch publications also refer you to their other publications often.  I did enjoy this book for a quick read but the highlights (fiber information, tips for faster sewing, and pattern alterations) can be found somewhere else.  I posted my favorite tips from this book here.  The fiber information can be found online.  All the Palmer/Pletsch pattern alterations can be found in their other books.  I'm still reading the other 2 books I own (Fit for Real People and Pants for Every Body) but I'm guessing there is a lot of overlap there as well.  This book falls into the recommendation category "borrow or steal" but don't buy.

    Saturday, January 16, 2010

    Book Review: Encyclopedia of Sewing Machine Techniques by Nancy Bednar & JoAnn Pugh-Gannon

    Encyclopedia of Sewing Machine Techniques

    Paperback, 336 pages
    Published in 2007
    ISBN:  9781402742934
    $24.95 USD
    Details from Amazon here


    This book is organized as a reference how-to book, meaning you just look at the Table of Contents, find the technique you want, and flip to that page.  This isn't a book you would read cover to cover.  In that respect, it is an easy reference book to use. The techniques are organized by categories of usefulness: decorative and indispensable.  My only complaint about the book is the paperback binding.  It does have a sturdy cardboard cover but spiral bounding would be more user-friendly.  For every sewing machine technique you will find a summary of why and when you would use that technique, machine set-up (stitch length and width, presser foot, needles, thread, tension and other recommendations), suggested fabric choices, and additional supplies that may be necessary.  Each technique has excellent step by step full-color pictures and then a picture of the completed garment.  Although it's not necessary, a picture of the completed garment or project just gives you ideas for how you might use this technique in your own sewing.  For people using basic mechanical machines like myself, some of the techniques may also be accomplished with alternative stitches and the authors provide that information whenever possible.  Probably the best thing about this book is the inspiration you will get from it.  I am willing to try some decorative touches with my sewing because the instructions are so well-written.

    Book Chapter Headings:
    1. Creative Techniques
    • Applique: basic satin, bias bar, blanket, decorative, frayed edge, madeira, mola, net, reverse, shadow
    • Battenburg
    • Bobbinwork
    • Charted needlework
    • Circular embroidery
    • Cording: monk's, on scalloped edges
    • Couching: beads, sequins, cords, braids, and bulky fibers
    • Criss cross chain stitching
    • Cutwork
    • Drawn threadwork
    • Entredeux:  basic & corded
    • Embroidery: eyelet, free-motion
    • Fagoting:  traditional, bobbinwork, bundled
    • Folded flourishes:  shark's teeth, prairie points
    • Fringe:  long, short
    • Heirloom sewing (5 techniques)
    • Hemstitching:  double and single wing needles
    • Lacemaking
    • Monogramming
    • Quilting styles (numerous)
    • Ruching
    • Ruffling
    • Scallops
    • Silk ribbon machine embroidery
    • Smocking
    • Stippling
    • Tucking:  Mexican, picot-edged, single needle
    2. Indispensable Techniques
    • Bias binding
    • Buttonholes: corded, bound, decorative
    • Edge finishes: picot, rolled, wire-edged
    • Gathering: basic, clear elastic, over cord
    • Hem finishes: corded, decorative stitch, double & triple needle, hemmer feet, hem stitched, raised double needle, shadow
    • Mitering corners
    • Seam finishes:  edge-stitched, flat-felled, French, Hong Kong, tricot-bound
    • Topstitching
    • Zippers: centered, invisible, placket, hand-picked 
    3. Important Information
    This section contains contact information for all the sewing machine manufacturers.

    Index

    Photographs:  Tons!! See comments above.


    Would you recommend this book as a MUST HAVE?
    Yes.  Great reference book of not only decorative but essential techniques with well-written instructions and great pictures.

    Book Review: The Sewing Stitch & Textile Bible by Lorna Knight

    Sewing Stitch & Textile Bible

    Hardcover, spiral bound, 256 pages
    Published in 2007
    ISBN:  9780896895270
    $29.99 USD
    Details from Amazon here


    Book Chapter Headings:

    1. Tools and Equipment
    Nothing ground breaking here.  Essential tools for cutting, measuring, etc.  This is the first book I've seen that listed the different types of irons (including a tank iron) and hand sewing needles.  Learning the differences between hand sewing needles can be easily done in the store, however, by reading the packaging.  Basic parts of sewing machines and sergers are included.  There is a small section on presser feet with pictures.  This section gives a beginner a great shopping list for basic presser feet to own (straight stitch, invisible zipper, blindhem, narrow hem/picot, overcasting, walking/even feed, pin tuck, gathering, and clear/embroidery).  I do like the small section about threads, including all the basics plus bobbin fill, basting, top stitch, wooly nylon, and embroidery floss.  I haven't seen other books that included so many thread options.

    2. Stitch Directory
    For each stitch you get: step by step directions with colored drawings, recommendations for use, fabric selection, notions and stitch size, pressing/finishing, and alternatives (how to duplicate a hand stitch on the machine and vice versa).  Most of the alternatives are pretty self-evident.  I'm pretty ignorant of hand stitching and I've always just made up whatever worked for the situation.  The only section of this book that I really like is the pages with hand stitches on them.  Serger/overlocking stitches are included in this section.  There is a section of decorative stitches (pin tucks, knotted hem stitch, smocking, etc.). This book includes more decorative stitches than other books I've seen so this book could be a supplement for those that use lots of decorative stitches but I'm guessing there are other more complete books on the market. 

    3. Techniques and Finishes
    Includes all the different types of seam finishes, including Hong Kong, flat-felled, interfaced hem, horsehair braid, boning seams, etc.  Sewing buttons, buttonholes and zippers are included.  I do like that this book included tips for buttonholes in stretch fabrics, when a keyhole buttonhole is appropriate, corded button loops, and making eyelet holes. 

    4. Textile Directory
    This fabric guide section is useless compared to the wealth of information you can get from either of the 2 popular fabric guides: More Fabric Savvy by Sandra Betzina and Claire Schaeffer's Fabric Sewing Guide.

    Additional information:
    This book has many photographs, pretty detailed but many are small. 

    Would I recommend this book as a MUST HAVE?
    No.  I would recommend checking it out of the library or borrowing someone else's copy for some great tidbits of information.  If you are a beginner, this book could be a great supplement to your basic sewing book.  Several sections of the book just aren't helpful but there are some real gems in a few sections.  

    Pattern Addiction Satisfied...For Now

    I stopped at Hancock's today for the McCall's and Vogue pattern sale.  Here are the latest acquistions:

    McCall's 6024--Everyone seems to love this pattern but can you blame them? View C was calling my name.

    M6024

    McCall's 6025--Designed to be a wadder in my opinion but I like it for a nightgown...and it has fewer pieces than the ill-fated M5925 (see below).

    M6025

    McCall's 6035--Can a gal ever have enough basic blouse patterns? Princess seamlines too!

    M6035

    McCall's 6039--Ditch the crazy, crafty materials and this is a cute jacket.

    M6039

    McCall's 6041--Again, ditch the crazy, crafty crap and this is a great jacket.

    M6041

    Vogue 7881--I think I bought this one just to have Claire's tips for couture pants.

    V7881

    I've haven't done well this week with my New Year's resolution to sew 1 hour a day.  Although I did find time to do some sewing-related shopping today.  Does that count?  I cut out fabric for McCall's 5925.

    M5925

    M5925 nightgown

    I've already decided that I will never make this pattern again and I haven't even started sewing it yet.  It had ELEVEN pattern pieces for view A!!!  The bodice sections are also self-lined.  This pattern is designed to be a wadder but I decided it would make a cute nightgown.  I must have read the wrong line for yardage requirements because I didn't have enough for the sleeve extensions.  I know I hate a project when I use my leftover Pellon for the interfacing.  Care to place any bets on whether I actually finish this project?

    I also have fabric preshrunk for some pajama pants.  I will add accent cuffs to the pants legs for the mint green (white with flowers print for accent) and red (pink with red flowers for accent).  The red print is looking a bit fuschia...trust me, it coordinates well.

    PJ pants

    Some more pajama pants and perhaps a cami with lace trim from this fabric:

    Green cotton with white flowers

    I spent an hour just playing around with the buttonhole functions on both of my machines.  I do like the 4-step buttonhole on the Singer CG-590 but I'm not wowed by it.  I have an automatic buttonholer on order but I'm squabbling with the seller.  Advertised as a "new in box" Singer Professional Buttonholer.  It's in good condition but not new.  Had I known this, I would have ordered it cheaper on eBay.  Don't you wish you could reach through your computer and smack lying online sellers?  I still have 4 doubleknit cardigans waiting for buttons and buttonholes but I just can't bring myself to put them in.  This whole buttonhole fiasco has taken the wind out of my sails.  What is putting a little pep in my step however is my 3-day weekend!!!  I haven't had Martin Luther King Day as a holiday in years.  In perfect timing to reflect on MLK and what he stood for, DH and I watched our NetFlix movie, "The Express: The Ernie Davis Story."  A fantastic movie with several great story lines.  I highly recommend it.

    Monday, January 11, 2010

    Book Review: The Sewing Machine Attachment Handbook by Charlene Phillips

    Sewing Machine Attachment Handbook

    ISBN: 9780896899230, Retail $16.99 USD
    Details from Amazon here
    Paperback, 144 pages, published May 29, 2009

    Book Chapter Headings:
    1. A Brief History of Attachments (this section is interesting to read)
    • Griest/Greist Manufacturing Company
    • Western Electric and Graybar Manufacturing Company
    • Wilcox and Gibbs
    • Singer Sewing Machine Company
    2. Types of Sewing Machines (very basic information here)
    • Mechanical
    • Electronic
    • Computerized
    • Sergers
    3. What to Look for in a Sewing Machine (too generalized to be helpful)
    • Assess: your sewing projects, durability, size & location, and cost
    • Research sewing machines
    • What features do you need?
    • Shopping tips
    • Determining if a machine is mechanically sound
    • Basic troubleshooting
    4.  Setting Up Your Machine (surprisingly few pictures here, all the information here can be found in your sewing machine manual)
    • Stitch length regulator
    • Pressure regulator
    • Tension control
    • Solving some common problems (skipped stitches, fabric puckers, etc.)
    5. Determining Your Shank Type (the pictures of all the shank types is helpful for a beginner but I've never found measuring necessary to determine shank type)


    6. Clamping Attachments Onto Your Machine (surprised that feet that slide & snap-on aren't included here)
    • Side clamp
    • Back clamp
    • Top clamp
    • Bed clamp
    7. Using Your Attachments (instructions and pictures for each attachment, as well as ideas for how to use them, various historical tidbits interspersed throughout)
    • Attachment Foot--attaches hemmers onto foot (Would've liked to see a line about interchanging feet here. When you shop for presser feet, "compatible with" on the packaging and in sewing machine manuals make it seem like you can't interchange feet. I have a Singer 1732 that came with a low shank attachment with lever and another Singer CG-590 that is a true snap-on. I can swap the feet between machines if I unscrew the snap-on attachment and use the low shank attachment with lever.)
    • Cloth Guide, aka Seam Guide--for straight seams (All the guides pictured are for older machines where they can be screwed on. A magnetic seam guide is mentioned but not pictured.)
    • Bias Cutting Gauge--to attach to your scissors for cutting bias strips, instructions for piecing a bias strip (Strictly a vintage piece. Neat idea and would be a nice addition to a vintage sewing accessories collection but a rotary cutter and mat with bias markings would be more accurate.)
    • Binder Attachment--automatically folds and places bias strips over the edge of your fabric as you sew, includes instructions for french folds, making a lattice design with binding, binding a ruffled edge, etc.
    • Bias-Tape Maker and Fusible Tape Maker (nice tutorials)
    • Adjustable Tape-Stitching Presser Foot--edges your fabric with various widths of binding tape, the tape must already be prepared
    • Tucker--makes pintucks and is adjustable for tuck size and spacing
    • Ruffler--makes ruffles and pleats
    • Foot Hemmer--hemming the edge of fabric, looks like the "rolled hem" foot for my Singer, can also use for felled seams
    • Hemmer Set--allows you to hem up to 7/8-inch without measuring, creasing and pinning
    • Adjustable Hemmer--allows you to vary the hem width with one attachment instead of a set
    • Edge Stitcher--keeps seams straight while you attach lace, ruffles, piping, etc.
    • Gathering Foot--gathers for a slight fullness, instructions for puffing or shirring fabric, shirring elastic, and smocking
    • Double Shirring Foot--gather or shir fabric while attaching gather to your garment, this is what Singer calls a "gathering foot", includes instructions for twin-needle sewing with this foot
    • Adjustable Zipper/Cording Foot--rides close to the bulk without piercing the zipper or cord
    • Welting Foot--covers cotton filler cord, like the adjustable cording foot above, but this has a groove underneath to keep the cord in place
    • Felling Foot--for creating felled seams in 1 step
    • Darning/Embroidery/Free-Motion Quilting Foot--the foot barely touches your fabric and you control the fabric (not the feed dogs) to create the stitch design
    • Quilting Foot--for maintaining even spacing when stitching blocks, diamonds, etc. You can remove the guide bar for more flowing patterns
    • Walking Foot--aka "Even Feed Foot", used for keeping fabric layers from creeping (matching plaids, sewing slippery fabrics)
    • Sequin Foot--has a slot on it that handles trim widths up to 3/8-inch wide
    • Buttonholer--aka "automatic buttonhole attachment"
    • Braiding Presser Foot--has a slot for attaching trims up to 3/16-inch wide
    • Underbraider--apply narrow trims from underneath the fabric (this foot confuses me a bit and I think I would need to see it in action to understand)
    • Stitch-in-the-ditch Foot--stitch in the ditch (seam) or for very close edgestitching
    • Stocking Darner--vintage piece used for darning stockings
    • Zigzagger--adapts the straight-stitch machine for some decorative stitching
    8. Resources (this section is not helpful. Anyone with a basic understanding of internet searches has already found the few resources listed here for machine manuals, attachments and machine collecting.  This section could use some real beefing up.)


    Additional information:
    This book has fabulous photographs. 

    Would I recommend this book as a MUST HAVE?
    Maybe.  I would recommend this book if you can borrow it from someone or check it out of a library.  I think those that collect vintage sewing machines and accessores would love this book more.  It was a quick read, wonderful sewing history and I used it to determine which presser feet to invest a little money in.  Now I'm done with the book and don't know what to do with it. I'll probably keep it because it is fun to look at.   Once you have your presser feet, the book you really need is "Encyclopedia of Sewing Machine Techniques" by Nancy Bednar & JoAnn Pugh-gannon (ISBN: 9781402742934).  If you are a collector, this is a nice book to own.

    Saturday, January 9, 2010

    Tools and Toys

    My Singer CG-590 was returned to me this week!  Just in time, too.  My Singer Esteem 1732 is terribly unreliable for buttonholes.  1-step buttonhole?  Only every other buttonhole looks good.  I got so fed up, I scoured the internet for an automatic buttonhole attachment.  I purchased a brand new 1973 Singer automatic buttonhole attachment with several templates.  It hasn't arrived yet but I'm hoping it will also work on my CG-590 as both of my machines have low shanks. 

    This leads me to the purpose of this post...tools for sewing by hand or machine.  When my mother taught me how to sew, it was pretty basic in terms of sewing tools.  I had fabric cutting scissors and pattern paper cutting scissors, color ball pins, universal needles in size 11 only, general sharps hand sewing needles, a square of white chalk, seam ripper, yard stick, sewing gauge, basic iron, and the presser feet that came with the machine (general purpose, zipper, and automatic buttonhole attachment).  I used the same universal size 11 needle to sew every type of fabric.  I didn't replace them until I broke them.  I also never replaced my pins or hand sewing needles.  I never oiled my machine or had my scissors sharpened.  I ironed everything on the same dry heat setting and used the same lightweight, nonwoven fusible Pellon to interface everything.  I also never measured myself.  I guessed what my size was and cut the pattern out and assembled the garment without any alterations. 

    The crazy thing is it all worked for me!  Sure I broke some machine needles and snagged a few garments because of it.  The snags were always hidden inside the finished garment.  I sewed knits, satins, laces, denim and wovens all with the same needle, no problems.  Cheap, cardboard interfacing somehow never detracted from my garments.  And everything fit.  My machine finally died after 10+ years of sewing without proper maintenance.  It was only a basic mechanical machine so I'd say I got my money's worth. 

    I reflect on my old sewing techniques now and realize I must have been blind.  I can't imagine all my garments fit correctly.  Surely something needed altering...or did my body really change that much in 15 years.  I'm sure the cheap Pellon interfacing didn't work so well on some fabrics.  There must have been some bubbling or overly stiff facings somewhere in my wardrobe.  What I do remember correctly, however, is my tools got the job done to the best of my abilities.  I've since purchased several items to make sewing easier; these are my toys.  Tools are the basics to get the job done and toys are the accessories that make it easier.   

    Now I have a Rowenta iron, various pressing aids and a large variety of pins and needles.  I have pin cushions, magnets and even a "Needle Nest."  I have numerous devices for measuring and marking.  I own several types of presser feet now but still find myself sticking to the basic 3 (general purpose, zipper and buttonhole).  I even bought pinking shears, snippers, and rotary cutters with mat.  I love my pattern weights too.  I've discovered Pellon makes more than one type of interfacing.  I've also discovered that I dislike most of their fusibles and all of their nonwovens.  Palmer & Pletsch and Fashion Sewing Supply interfacings make up the bulk of my interfacing stash now.  I can take my machine apart and look for needed repairs and oil when necessary.  I no longer crawl around on the floor pinning and cutting my material; my knees and back won't allow it.  I'm still learning how to make the ideal adjustments to my patterns but I'm enjoying the process.  I haven't bought a dress form yet and don't know that I ever will.  Maybe some toys just aren't necessary for every sewer.

    I do hope for some new toys, however.  In my dream sewing space, I would have a large surface for ironing.  I would also have a table for cutting and pinning and it would be at the correct height to save my back.  In the meantime I'll settle for the dining room table and a portable mat for ironing, like this one.

    Just yesterday I received some books I ordered from Amazon: The Sewing Machine Attachment Handbook by Charlene Phillips and Encyclopedia of Sewing Machine Techniques by Nancy Bednar & JoAnn Pugh-Gannon.  I don't know that the Sewing Machine Attachment Handbook is a keeper in terms of a reference book.  I read through it once and made a list of all the presser feet I think I will actually use and those that will really save me time.  Once I buy those presser feet, I don't know that I have a use for this book anymore.  What's on my list of must-have presser feet?

    1. Walking, aka Even Feed, Foot (instructions for use):  stitching 2 different difficult-to-sew fabrics together, stitching velvet, leather or knits, and allow plaids to stay matched while sewing
    2. Singer Walking Even Feed Foot
    3. Adjustable Zipper/Cording Foot (instructions for use): adjustable for cord of any size and stitching as close to zipper as possible
    4. Adjustable Zipper Cording Foot
    5. Button Sewing Foot
    6. Singer Button Sewing Foot
    7. 1/4-inch Foot with Edge Guide (instructions for use)
    8. One quarter inch Foot with Edge Guide
    9. Embroidery & Darning Foot (instructions for use)
    10. Open Toe Darning Foot
    11. Edge Joining Foot, aka Stitch in the Ditch (instructions for use: stitch in ditch and edgestitching)
    12. Stitch in the Ditch Edge Joining Foot
    13. Overcast Foot (instructions for use)
    14. Singer Overcast Foot
    15. Side-Cutter Foot
    16. Side cutter foot
    17. Ruffler Foot (instructions for use):  ruffles, pleats or groupings of gathering and pleats
    18. Ruffler foot
    19. Sequin Foot for sequins, lace, rick rack
    20. Sequin foot
    21. Braiding Foot (instructions for use): adding decorative trim to projects (narrow ribbon, silk twist, wool yarn, and soutache braid)
    22. Braiding foot
    23. Invisible Zipper Foot--metal instead of the flimsy plastic one I already have, (instructions for use)
    24. Invisible Zipper foot
    25. Pintuck Foot (instructions for use)
    26. Singer Pintuck foot

    What presser feet are your favorites?

    (Photos from SewingMachinesPlus.com)

    Monday, January 4, 2010

    Darn You, Bloggers!!!

    I'm addicted to $0.99 sales for patterns.  I get so many ideas just from looking at the pictures and they're only a buck so why not?  I grabbed some Simplicity and Vogue patterns at the latest Hancock's and JoAnn's sales.  I figured I was all done with buying patterns until the summer, which is great because I have no more space for patterns.  And then you darn bloggers had to post your latest acquisitions!

    I surrender to my pattern addiction.  Now I must go pick up some McCall's when they go on sale.

    Here are my Simplicity and Vogue finds this past weekend.

    V2973--trendy jacket by Montana, the pants I could do without

    V2973

    V1065--the lines on this jacket and skirt by Badgley Mischka caught my eyes months ago and I finally caved in.  Do you find yourself gravitating towards a particular designer's patterns?  I love Badgley Mischka, particularly the dresses.

    V1065

    V2532--just a basic shorts/pants pattern but the width of the leg is appealing to me...minimize my hips, please!

    V2532

    S2451--I've also been eyeing this for awhile

    S2451

    S2733--Not a fan of tops with pockets but I could see this as loungewear, and possibly a fun blouse, minus the pockets.

    S2733

    S2934--loungewear for me

    S2934

    V8479--the low horizontal seam on the rear may minimize large rears, what do you think?  Break it up instead of one massive tush?

    V8479

    S2452--I'm visualizing view A in some dark sateens or silk linens

    S2452

    S2455--I like the dress minus the belt

    S2455

    S2446--Amazing fit should be possible with the princess seams!

    S2446

    Saturday, January 2, 2010

    Sewing Space Complete!

    Like many people, I don't have a sewing room.  I live in a small space shared with 2 cats and DH so I take what I can get.  DH was kind enough to surrender most of one closet to me but he drew the line at dresser drawers.  I claimed one drawer anyway.  He's been griping for 2 weeks about that and the fact that my sewing space looked like a bomb went off.  I spent most of New Year's day cleaning out my sewing space and reorganizing the closet to accommodate sewing and general storage.  I'm exhausted and my back is killing me but I almost wanted to sleep in my new sewing space last night.  Almost....

    BEFORE PICTURES
    DESK

    Desk before

    CLOSET

    Closet before

    Yes, folks.  That is a litter box in the sewing/storage closet, which is why I didn't sleep in my newly cleaned sewing space.  The litter box is a fight I'm never going to win so I compromised by storing ALL my sewing stuff in plastic.  DH is happy to be able to actually walk into the closet and he got his dresser drawer back.  The cats are happy that the crapper, sorry...litter box, is still in place.  And I'm happy to be able to see what I have and stop buying duplicates of everything.


    AFTER PICTURES
    DESK:
    Kinda cleaned off.  My UFOs wouldn't fit into my storage space so they are still sitting on the desk but at least there is room for my Singer CG-590 when it returns.  I had under desk storage before but everything was haphazardly thrown into drawers.  Plus I didn't have enough storage so I added 2 more plastic drawer sets.

    Desk after

    Most of the stuff under the left-hand side of the sewing table is DH's storage.  If I could only figure out how to make that go away without him noticing....

    UNDER DESK STORAGE
    This is where I keep all the tools I most use, plus some notions.  I also found a place to store all my straight & curved rulers (sitting below the desk, on top of the plastic drawers).  Part of my sewing smarter resolution: organize so things can be found quickly.

    Desk organizer

    MOST USED DRAWER
    Pens, seam rippers, scissors, pin magnet, sewing machine repair, and presser feet
    (I first used the toothbrush to clean my wedding dress.  Now I use it for cleaning my sewing machine.)

    Drawer cutting & machine supplies

    2ND DRAWER
    marking & pinning supplies, hand & machine sewing needles, fusing and gluing supplies
    I use paper first aid tape (the Nexcare roll) for taping tissue pattern pieces together.  It doesn't melt under the iron, it's sturdy, and I can write on it easily.

    Drawer marking & pins

    3RD & 4TH DRAWERS
    Thread--I'll have to go back and sort by colors.

    Drawer thread

    5TH DRAWER
    Tons of zippers, my supply of organza selvedges, and pattern weights (these wouldn't fit with the rest of my pinning supplies)
    I use organza selvedges for stay tape and stabilizing small/narrow places.

    Drawer zippers  organza & weights

    6TH DRAWER
    Buttons and other non-zipper closures
    This will need another hour of organizing--buttons by color. 

    Drawer buttons

    CLOSET AFTER
    After downloading my pictures, I realized none of the before pictures can show how truly trashed the closet was.  You don't even see the mess on the shelves, the huge stash of luggage and fitness equipment in the back, or the disorganization stuffed into my hanging shelves.  Trust me, it was scary.

    Closet after

    The cat litter box is still there but now we can get around it. The most used pieces of luggage are stacked on the left where we can get to it quickly but all the other pieces are stacked on the shelf at the back. All the coats, gloves, hats, and scarfs were moved to another closet after we donated all the stuff we don't use. All the fitness equipment was moved to our master bedroom walk-in closet. I wish THAT closet was my sewing storage. It's HUGE! The remaining boxes and general supplies were better organized so we know what we have.

    Closet after 1

    I purchased a third hanging shelves unit but I could really use a fourth...no space left. I positioned the 3 hanging shelves and my stacked drawers as best I could so I could still open them.

    Closet after no litter box

    In the back left corner is my tucked away drawer organizers and rolling cart. The fabrics were organized by type (wools, shirtings, knits, etc.) and projects in progress.

    Closet corner after

    I used to hang my half-completed garments up in the bathroom on the shower curtain rod and on any available doorknob. In the dress garment bag, at least they are all in one place and protected from the cat litter dust. The rolling cart contains most of my interfacings and can be pulled out easily so I can access the bottom drawers in the corner.

    Organizer bottom

    The bottom drawers only contain patterns.

    Organizer top

    The top drawers contain more patterns and then random notions (seam tapes, shoulder pads, ribbons, velcro, elastic, etc.) are in the topmost drawers. The smaller drawer organizers used to be where I kept marking and pinning supplies. I'm going to use each drawer to hold all the assembled notions and threads for a particular project. I also found a ton of papers on my sewing table (sewing machine manual, fabric order packing slips, instructions for various tools). The binder will keep them all neatly organized.

    It's not perfect but I don't stress out just looking at my sewing space anymore.  I discovered I have TONS of zippers, buttons and threads.  There is no earthly reason for these to be here unless they are going to be used for a particular project.  Now I can shop my stash first.

    Palmer & Pletsch has a sewing room book out and a new edition coming in the spring.  It has great reviews but I don't know that I want to invest in it just yet.  How is your sewing space organized?  Do you like it?  What would you do differently?

    Just my opinion....

    This policy is valid from 11 December 2009
    This blog is a personal blog written and edited by me. This blog does not accept any form of advertising, sponsorship, or paid insertions. We write for our own purposes. However, we may be influenced by our background, occupation, religion, political affiliation or experience.
    The owner(s) of this blog will never receive compensation in any way from this blog.
    The owner(s) of this blog is not compensated to provide opinion on products, services, websites and various other topics. The views and opinions expressed on this blog are purely the blog owners. If we claim or appear to be experts on a certain topic or product or service area, we will only endorse products or services that we believe, based on our expertise, are worthy of such endorsement. Any product claim, statistic, quote or other representation about a product or service should be verified with the manufacturer or provider.
    This blog does not contain any content which might present a conflict of interest.
    To get your own policy, go to http://www.disclosurepolicy.org