Thursday, December 31, 2009

Guidelines for Doing It Better Next Year

As I read all the "year-end wrap-ups" and "2009 in review" posts, I reflect on my experiences this year of course.  Hmmmmmm...it was pretty crappy, actually.  I completed one garment.  Yup, just one; lots of UFOs.  I loved that one garment so much, I got married in it.  That was the highlight of the year.  Everything else was pretty crummy so I won't bore you with it.  I end this year on a high note, however.  I'm still married.  (He's too sweet to admit I'm driving him crazy.)  I have learned oodles about sewing that I didn't know before and I'm excited to plow through my closet of fabric.  To start the year off right, I read one of my Christmas gifts, Mother Pletsch's Painless Sewing, cover to cover. 

Take home message:  SEW SMARTER

In the spirit of sewing smarter, listed below are my favorite tips and tricks from the Painless Sewing book. 

  • When cutting fabric, place the right sides together so you are ready to pin the major seams (center front, sides, etc.) and sew right away.
  • Pin your pattern to the fabric at the corners only.  Pattern weights or using your hand to anchor the pattern as you cut will save you time.  This does not apply to slippery fabrics, of course.
  • Forget about cutting notches and such.  Snip in the seam allowances for center back/front lines, notches, hem folds, etc.  (This is assuming you have a 5/8-inch seam allowance.)
  • Don't stop and clip threads after each seam you sew.  Sew the seam on one piece and then start another.  It's easier to cut the threads off a string of pieces then to start and stop every time.  (I also don't backstitch.  I shorten my stitch length significantly for the first and last several stitches on the seam, pull the threads a bit to get some wiggle room, and then start sewing the next section.)
  • Finish flat pieces first.  This is a hard habit to break if you've been following pattern instructions for years.  It is much easier to sew pockets, zippers, and collars onto the flat piece, then sew up the side seams.  Working in a tube is a PIA.  I also sew sleeve caps to the shoulder seams and then sew up the bodice side seams and the sleeve seams in one step.
  • Prevent thread jams by holding the top and bottom threads for the first 4 stitches sewn.  Also, hold fabric tautly in front and behind the needle.  Taut, not stretched.
  • Sew in blocks of time and set yourself up for a quick start next time.  This is a bit like cleaning up your desk at work at the end of the day.  It's much easier to dive in the next morning when you don't have to dig through piles.  Fitting and planning is one block (fit the pattern, select all your notions, interfacings, etc.).  Cutting, marking, applying interfacing, and pinning is another block.  It would be easier to start sewing if all of the above was done the day before and neatly stacked.  Sewing and pressing is another block, leaving all the finishing details (hand stitching, buttons, etc.) for the final block.  I prefer to do all my hand stitching sitting next to my DH on the couch.  Putting the threads and closures together with the garment (with hems already pressed and pinned, button placements marked, etc.) makes it easy to finish all the fine details in one sitting.
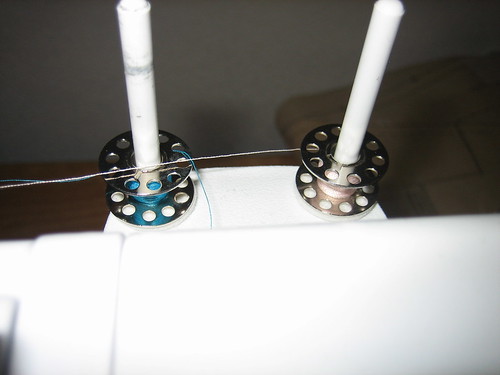
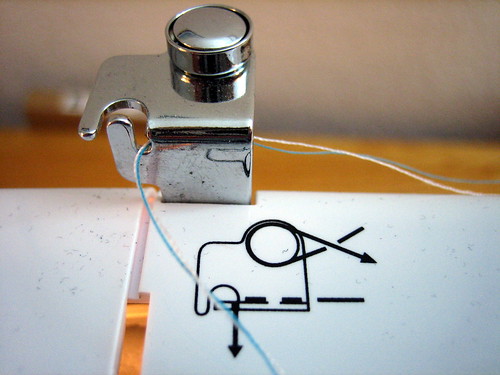
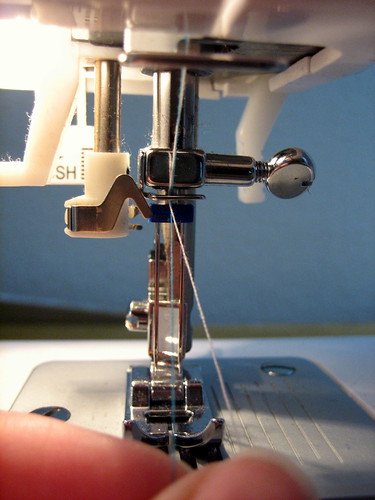
  • Become familiar with all the features on your sewing machine.
  • Sew wardrobes, not just separates.
  • Buy the best fabric you can afford.
  • Have an interfacing stash.  Stock up on your favorites and you'll never have to stop mid-project to run to the fabric store.  Also, preshrink your interfacings right after you buy them so they are ready to go when you need them.  I also keep a stash of black, white, tan and blue threads and zippers.
  • Buy the right size pattern.  Buy according to your hip measurement for bottoms.  Buy according to your bust measurement for tops, dresses, and wardrobe patterns.  Use your high bust measurement if it is much smaller than your full bust measurement (at least 2.5 inches smaller). 
  • Press your tissue pattern before cutting (dry iron, wool setting).  This increases cutting accracy.
Many of these tips are obvious but sometimes we all need some reminding.  Bad habits are hard to break and good habits are hard to keep.

Best wishes for smarter sewing in 2010.  Happy New Year!!

Wednesday, December 30, 2009

Patting Self on Back

So I'm cruising through my Blogger Dashboard today and I see a post on CraftStylish for a giveaway at BurdaStyle.  I completely forgot they were giving stuff away all month long.  Darn it....

I followed the link for the giveaway and at the bottom of the page is this Friday's Technique of the Week...MINE!  I posted a tutorial for twin-needle stitching earlier this month.  I figured I wasn't the only person that had never tried this before.  It feels great to know that others found the tutorial helpful.  I read blogs all the time but find that I get a little lost because I don't have the sewing knowledge that others have.  Feels good to know I'm not the only one out there that needs some basic help from time to time.

I'm awfully tired from patting myself on the back so I'll post again later.  I got some great sewing books for Christmas that I've been reading cover to cover.  Reviews to follow....

Sunday, December 20, 2009

Bemberg Rayon Lining Color Card

Yesterday I received my Bemberg Ambiance rayon lining color card from Vogue Fabrics.  I finally understand what all the fuss is about.  There are so many colors, natural-looking colors to match your fashion fabric.  No more poly linings in bad colors for me!  And of course, it's rayon so it feels soooooo nice.  I only wish it came in 60-inch wide yardage, instead of 45-inch wide.  I think the best price I've been able to find is $6.99 USD/yard at Vogue Fabrics.  They also offer a color matching service but the fabric you're trying to match must be one of the Vogue fabrics.

Bemberg linings:
  • silk-like feel
  • absorbent like cotton (so sweat won't stain your fashion fabric)
  • breathes well
  • anti-static
  • anti-cling
  • dry clean or hand wash
  • 100% cupro rayon
  • eco-friendly
A nice chart comparing various properties of several types of lining can be found here.  As you can see, the Bemberg lining rates highest for everything except "abraison resistance", which I'm guessing means it will snag.

Vogue Fabrics color card--57 samples (samples measure 2" x 3")

Bemberg color card from Vogue Fabrics

Bemberg color choices

Bemberg color names

The 57-color card at Vogue Fabrics is here for $5.00 USD and free shipping.  (It is mailed in a standard size 10 business envelope.)

The 80+ color card at The Sewing Place is here for $11.99 plus $6.95 shipping (USD).

Website review: Denver Fabrics

Denverfabrics.com


How is the web site look & feel / user friendliness? Is it easy to surf?
It has some great features and some not-so-great features. I like the specific categories in Apparel Fabric: swimsuit lining, Batistes, etc. Makes it easier to find what you want IF they have it. Many of the specialty categories are completely empty and have been for some time. They should gray them out if they don't have anything for that category. The search engine is good in that you can specify a cotton stretch poplin, for instance, and only get those fabrics and can then narrow it down by fabric weight, price, color, or width. If you don't know exactly what you need, it is much more difficult to surf this site. They also appear to have several of the same color and type fabrics. Sometimes the multiple listings are the same width fabrics and sometimes they differ by an inch or two. That is confusing to me. If you are searching a sales promo, the fabrics don't stay in order as you browse page by page. You may add something to your cart and then go back to the page you were shopping from and all the fabrics are in a different order or missing from that page. Also very confusing.

Is this a commercial web site? If yes how are the prices? Do they have a secure shopping cart?
Commercial web site. The everyday prices are better than most sites. Silk suitings for $6 USD/yard! I shop here if I need something specific and don't want to wait for a sale somewhere else. You can sign up for sales emails.  Initially I didn't get any but as the holidays approached, I started receiving 1 or 2 a week.  Once you put a fabric in your cart, be very careful about how you modify the amount you are ordering. There are fields for whole numbers and fractions. (Yes, you can order as little as 1/8 yard.) If you change the whole number, you will have to wait until the page reloads to change the fraction as well. If you don't pay close attention, you could easily order the wrong amount of fabric.  They do have secure shopping cart but only accept Visa or Mastercard.

How is the customer service?
I've never needed to call customer service but they have called me when an item is out of stock. You must request that they call or email you though. Place any special instructions you have in the text box when you order. I used their online contact form once to give them some feedback and never heard from them.

Have you bought anything from this web site? If yes, was the item delivered on time?
I've made 4 purchases now. The first 3 were very large purchases. They arrived in boxes and the fabrics were not wrapped in a bag within the box. The boxes were well packaged though. The 4th purchase was for 20 yards of various fabrics and they sent it in a plastic envelope mailer! 20 yards is too much for that kind of mailer. It was torn in several places and the fabric was not protected within a bag within the mailer. Thankfully, none of my silks were damaged. They also don't label any of the fabrics but they do include the invoice. I always print my order confirmation from the site after placing the order so I can write down the type of fabric and care instructions because they don't send that to you. When browsing their fabrics online, they do list the fiber content, fabric width, weight (for denims and such), and suggested uses. If you are still unsure of the weight of a fabric, you may search by "blouse weight", "bottom weight", etc. They state you can receive your order within 10 business days. About 2 weeks sounds right. None of my orders have arrived quickly. One may have taken longer because when it did arrive, I completely forgot I had ordered it!

Would you recommend this site to others?
Yes and no. The search engine isn't ideal but the prices are good. If you have a very good idea of what you want and you have experience shopping for fabric online (not being able to touch it first), then this is a good site to shop on.

Wednesday, December 16, 2009

Newest Edition to My Family and New Year's Resolutions

As of December 15th, I am the proud momma of a Singer CG-590.  My dear dad bought me a sewing machine for Christmas after listening to me whine about the high cost of repairs.  Now I have two (the other one hasn't died yet)!  What's even better is my hubby isn't begging me to throw away the older one.  I get emotionally attached to sewing machines.  Weird, I know.

I haven't totally bonded with my new one yet.  It has a flaw and needs to be repaired.  Something is blocking the needle, underneath the feed dogs.  No amount of troubleshooting fixed it so I have to mail my new gift to the kind people at Singer.  I'm pretty annoyed about that but who am I kidding?  I'm not getting any more sewing done this year.  Too much to do, so little time.

Right now all the sewing snobs are saying mean things about my new machine.  It's not computerized.  It's not a Bernina.  Blah, blah.  I can't hear them over the roar of the motor.  That's right.  The motor rocks!  I bet I could sew through sheet metal with this thing.  Most of the reviews are mixed on this machine.  One thing everyone agrees about is the bobbin thread jams.  My mother has this same machine and she told me a little secret.  It's all about the bobbin spool.  You get some cheap, plastic class 66 bobbins with the machine.  Use only these!  The bobbins that came with the machine are also slightly curved, or convex on the outer portions so don't substitute with the flat class 66 bobbins.

Tonight I wrap my baby back up and send it off to Singer.  Can't wait to get it back!

This brings me to New Year's resolutions.  The usual...eat less, exercise more, etc.  I'm not a fan of resolutions but I do have a few for the new year.

Sew for 1 hour a day.  I spend way too much time not accomplishing much.  Maybe if I just work on a little sewing every day instead of weekend sewing marathons, I'll actually finish a project.

Use up my fabric stash.  L-O-V-E buying fabric.  If I don't start using up my stash, my husband will likely divorce me.  I see all these fabric stash running totals on the boards at PatternReview.com.  "2009 stash= 370 yards, Yards sewn to-date= 56"  Seriously, who really knows how much is in their stash?  I gauge mine by how many new shelves and drawers I have filled.  Instead of measuring how much is left, I'm going to measure how much I've used.

Sew wardrobes, not pieces.  I've planned a few wardrobes for sewing contests next spring.  I must admit that having to match and coordinate pieces has helped me use more of my patterns, think before I buy, be more creative and use up more of my stash.  Not too shabby.

Knock out 2 of the Singer Sewing Techniques each week.  See the list here.  These aren't necessarily things I've never done, just never done well.  It's all about improving my technique.

Notice that I left the better eating and more exercise resolutions off the list.  Who am I kidding? I'm 33 and haven't done it yet.  Best not to strain myself now.

Monday, December 7, 2009

Interfacings on sale!!

I've just about used up all my Pellon interfacing stash so I'm upgrading to some Palmer & Pletsch and some from Fashion Sewing Supply. Just so happens they are both on sale right now!

FabricDepot.com has all Palmer & Pletsch Perfect Fuse interfacings on sale 30% off. I think just about everything else in the store is on sale too. You won't see the discount until you put the item in your cart.

From the Fashion Sewing Supply Sew Exciting blog, apparently they have a need to reduce their inventory ASAP. Their 3 most popular (Pro-Sheer Elegance, Pro-Weft, and Pro Tailor Deluxe) are all on sale for $5.98 through December 12th.

Happy shopping!

Friday, December 4, 2009

It costs HOW MUCH for a tune-up?!!!

Singer Esteem machine = $100 USD

Tune-up at the local sew-vac store = $79.95

ARE YOU KIDDING ME?!!

I received a Singer mechanical machine for a high school graduation gift in 1994. (Quit doing the calculations. I'm 33 years old.) That machine cost $200 and I never had it serviced. I never even oiled it. It finally broke in 2002. I kept meaning to have it repaired but never got around to it since sewing wasn't my hobby of choice at the time. My husband finally got tired of seeing it and threw it in a dumpster. He redeemed himself by buying me a new machine.

Enter the Singer Esteem. Nothing fancy; 32 stitches and 1-step buttonhole. That's all I need. I even promised to take care of the machine. I didn't use it much last year but I oiled it as described in the manual. This year the machine is seeing much more action so I debated about paying for a tune-up. It has started squeaking like crazy despite cleaning and oiling. I took it down to the Sew-Vac shop. They tried to talk me into a tune-up for $79.95. You have got to be kidding me! I could just buy a new machine and keep the old one for parts.

I'm going to sew on this machine until it dies and then buy another. It is crazy to think about how many things are cheaper to buy new than repair. How do these repair shops expect to stay in business?

That got me thinking. How difficult would it be to learn some basic sewing machine repair and fix my own or others?

Apparently not that difficult. There are several DIY books you can buy or download for less than $30. I downloaded the Sew it Works! book for $19.95. I would pass on this one if I were you. It covers many of the basics but it still didn't help me fix my squeaking machine. The book warns you to not over-oil your machine but it doesn't tell you where it is okay to oil your machine. I found better advice at eHow.com...for free.

I found a great review for a 3-day sewing machine repair class through White Sewing Center. It costs $795 though. Pass. Mr. White does, however, offer a good selection of parts and tools at good prices.

EDITED 12-11-09:  Buyer beware of e-books by David Trumble or purchases at any of these sites:  http://www.fixsewingmachines.com/ OR http://www.sewinganswers.com/  OR  http://www.sewandquiltstore.com/  OR  http://www.repairsewingmachines.blogspot.com/ (inaccurate links, difficulty downloading products, disconnected contacts, etc.)

Reuben O'Doyle has self-published repair books for treadle, sewing, and serger machines. He also published a how-to book for running your own sewing machine repair business. Each of the repair books costs $20-$25 at his eBay store, Sew Many Things.

Gresslin Information Center offers a sewing machine repair manual on CD-Rom for $39.95. It includes generalities for all machines and then gives specifics for many Singers and a few Pfaff, Neechi and Viking machines. If you buy their combo with the vacuum cleaner manual, it is only another $10. (I can just see my husband rolling his eyes when I have the vacuum cleaner in 20 different pieces on the floor!) You can view the table of contents for the sewing machine manual here.

On the much pricier end California Academy of Sewing Machine Repair offers DVDs at $49.95 each. There are a ton of DVDs, many of them specific to a brand series. I'm guessing you could get by with ordering just the first 2 in the series but it's still rather pricey.

If you want free information, here are a few of my picks:
  1. SewUSA.com
  2. eHow.com: How to Clean a Sewing Machine
  3. eHow.com: How to Repair a Sewing Machine
  4. eHow.com: How to Repair Singer Sewing Machines
I'm leaning towards the Gresslin CD-Rom. I'm so damn irritated by the overcharging for sewing machine repairs that I'm willing to spend $80 just to learn how to avoid sew-vac shops in the future. Look for a future post(s) regarding cleaning, oiling, and troubleshooting for sewing machines. I like to share (smiling).

Wednesday, December 2, 2009

#27: Hems, Twin-needle stitched

Okay, so it's not 2010 yet. I'm feeling a bit like an overachiever and I've decided to get a head start on my list. I'm making some double knit cardigans using McCall's 5978 so I get to make buttonholes and hem with twin needle stitching.

My Singer book only briefly covers twin needle stitching so I found some additional internet resources as well.

  1. Sewing & Craft Alliance Guideline 11.227 Twin-Needle Sewing
  2. Julie Culshaw article at Timmel Fabrics
  3. Twin Needle Reference Chart by Carol Laflin-Ahles for Threads
To sew with a twin needle, your sewing machine must have:
  • zigzag capability
  • throat plate that has a hole wide enough for the double needle
  • 2 thread spool holders
  • zigzag foot or another foot with an opening wide enough for the twin needle
Don't worry if your machine manual doesn't mention twin needle stitching. Mine didn't but my basic machine (Singer Esteem) handled it just fine.

Twin needle sizes

Twin needles come in different sizes like other needles but you will notice above that there are 2 numbers in the size.

  • 1st number = distance between the needles (measured in millimeters--mm)
  • 2nd number = actual size of the needles
The first needle above on the left is a twin needle size of 80 with 2.0 mm between the needles. The second needle on the right is a size of 75 with 4.0 mm between the needles. (I used the 4.0/75 needle for the demonstration below. I liked the spacing better for hems.)

Even though each needle will get its own thread, only one bobbin thread is used. One needle is slightly shorter than the other so a single bobbin can pick up both threads. In the picture below, the top needle is just slightly shorter.

Twin Needle closeup

The twin needles create 2 parallel lines of topstitching and a zigzag stitch on the underside. The zigzag stitch helps maintain the stretchability in a knit hem.

For my samples below, I used a total of 3 different colored threads. When I hemmed my knit cardigan, I wound a small amount of the matching thread around a 2nd bobbin. So I ended up with one thread spool and 2 bobbins with the same thread.

Parallel lines of topstitching

Twin needle topstitching

Zigzag stitching on the underside

Twin needle back zigzag

All the examples of twin needle stitching I could find showed a zigzag underside stitch where 2 different threads were visible. If your stitching looks like the above picture, you shouldn't need to adjust the tension.

The stitch:
  • zigzag stitch should be selected
  • stitch length = 2.5-3.0
  • stitch width = 0.5
You essentially want a zigzag stitch that is so narrow, it looks like a straight stitch.

To prep the hem, fold over and iron your hem in place.

You are stitching on the RIGHT side of the fabric.

Because you are stitching on the right side of the fabric, it is very important that your folded over hem be even because you won't be able to see how close your stitches are to the raw edge. You will need to use your seam gauge on the throat plate or mark the throat plate with a piece of tape where your hem should hit so that the needles line up with the underside raw edge.

Twin needle seam gauge

In the above picture, my 1-inch hem lined up perfectly with the last mark on the seam gauge on the throat plate.

If you notice sporadic bubbling in your topstitching, it probably isn't a tension problem (that would give you consistent bubbling). If you look at the zigzag underside of the fabric, you should see that your stitching is way past the raw edge of the hem in the areas of the bubbling. You just want the top row of stitches to catch as close as possible to the raw edge without going past it.

Look at the underside zigzag picture again.

Twin needle back zigzag

The zigzag stitches aren't catching the raw edge, which is want you want. If it really bothers you, you can go back and trim it off. In my example above, I used scrap fabric and the raw edge is the "selvage."

Threading the needles:

Check your machine manual. Your machine may require that you separate the threads at the tension disks or thread guides. If you have a basic machine like mine, you can thread as follows.

Each needle gets its own thread spool on a different spool holder.

Twin needle spool pins

When I sewed, the 2 threads got twisted together at the needle but didn't mess up my stitching. If this is a problem for you, you can try Julie Culshaw's tip of threading one spool clockwise and the other counterclockwise so the threads come off in opposite directions.

I threaded both as one and didn't separate them until I got to the needles.

Twin needle thread guide

Twin needle threading the needles

Look for my completed garment in a separate post later. Now that I know how to use twin needles, I can't wait to try some decorative stitching with it.

Just my opinion....

This policy is valid from 11 December 2009
This blog is a personal blog written and edited by me. This blog does not accept any form of advertising, sponsorship, or paid insertions. We write for our own purposes. However, we may be influenced by our background, occupation, religion, political affiliation or experience.
The owner(s) of this blog will never receive compensation in any way from this blog.
The owner(s) of this blog is not compensated to provide opinion on products, services, websites and various other topics. The views and opinions expressed on this blog are purely the blog owners. If we claim or appear to be experts on a certain topic or product or service area, we will only endorse products or services that we believe, based on our expertise, are worthy of such endorsement. Any product claim, statistic, quote or other representation about a product or service should be verified with the manufacturer or provider.
This blog does not contain any content which might present a conflict of interest.
To get your own policy, go to http://www.disclosurepolicy.org